



Night Trains vs. Budget Flights vs. Sleeper Buses: The Surprisingly Smart Way to Cross Europe (Without Wasting a Day)
Why “overnight travel” is having a moment (and why you should care)
If you’ve ever stared at a map of Europe thinking, “It’s so close… why is getting from A to B eating my whole day?”, you’re not alone. Travelers are increasingly leaning into overnight routes—night trains, sleeper buses, and late/early budget flights—to squeeze more actual exploring out of a limited trip.
The catch: each option has trade-offs that aren’t obvious until you’ve done it (and sworn you’ll never do it again… or sworn it’s the best travel hack ever). This guide compares three practical approaches for crossing Europe overnight, with real-world tips and examples so you can pick what fits your schedule, sleep needs, and budget.
The three contenders at a glance
- Night trains: Usually the most comfortable overnight option, often city-center to city-center, sometimes pricier but can save on accommodation.
- Budget flights: Often cheapest on paper, but can cost you time (and money) getting to/from airports and dealing with strict baggage rules.
- Sleeper buses: Typically the lowest-cost and widest network, but comfort varies a lot—sleep quality can be hit-or-miss.
Option 1: Night trains (the “wake up somewhere new” classic)
What you’re really paying for
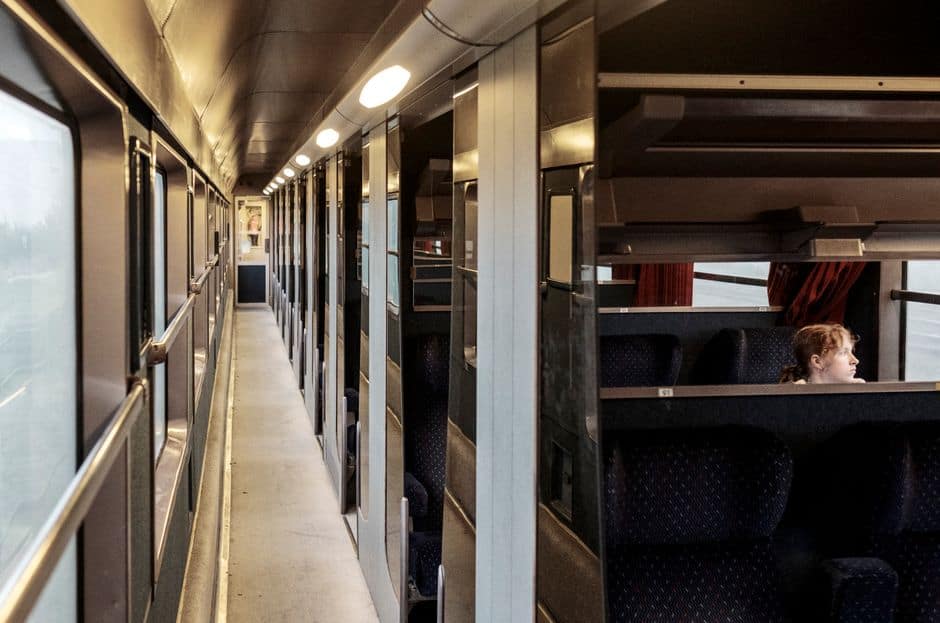
Night trains are basically “transport + bed,” and the value depends on whether you’d otherwise pay for a hotel. If a couchette costs more than a daytime train, that doesn’t automatically make it “expensive”—it might be replacing a €120 room and giving you a full day back.
Comfort & sleep quality
- Best for: light sleepers who still want a shot at real rest, couples/friends who can share a compartment, anyone who hates airports.
- Cabin types matter: seat-only is rough; couchettes are the sweet spot for most people; private sleepers are the splurge.
- Noise & motion: earplugs are not optional if you’re sensitive. Pack a sleep mask too—corridor lights can be surprisingly bright.
Speed & logistics
Night trains shine on mid-range distances—roughly 8–14 hours. You board in the evening, wake up in a new city, and you’re usually already downtown. No airport transfer required.
Real-world examples
- Vienna ↔ Venice: A classic overnight link that can drop you near the action early enough for a coffee and a stroll before crowds.
- Stockholm ↔ Hamburg: Great for bridging Scandinavia and continental Europe while skipping a hotel night.
- Paris ↔ the Alps: Certain seasonal services make it easier to wake up closer to ski towns without burning a whole travel day.
Actionable tips to do night trains right
- Book earlier than you think: couchettes and private cabins sell out faster than seats, especially on weekends.
- Choose your bunk strategically: top bunks can feel steadier for some people; bottom bunks are easier for late-night bathroom trips.
- Pack “platform-ready” toiletries: wet wipes, small toothpaste, and a tiny towel go a long way when facilities are basic.
- Don’t overplan the arrival morning: even good sleepers can feel a bit scrambled. Schedule a low-stakes start (market stroll, bakery crawl, etc.).
Option 2: Budget flights (the “cheap… if you play the game” route)
What you’re really paying for
Budget flights can be a steal, but the base fare is only part of the story. Add-ons can turn a “€29 flight” into €120 quickly:
- carry-on bag fees (especially if your bag is slightly oversized)
- seat selection (not required, but sometimes worth it if you’re tall or traveling with someone)
- airport transfers (a late-night taxi can wipe out the savings)
- snacks/water (airports love charging “emotional support prices”)
Comfort & sleep quality
- Best for: travelers who can sleep anywhere or don’t mind being tired for a day, people chasing a very specific cheap route.
- Reality check: an “overnight flight” in Europe might mean a 6 a.m. departure. That’s not sleep—it’s a pre-dawn logistics mission.
Speed & logistics
Air looks fast on paper, but door-to-door time can be longer than you expect: getting to an out-of-town airport, arriving early, security, and then getting from the destination airport into the city. It’s often efficient for longer jumps (e.g., Iberian Peninsula to Central Europe), especially when night trains don’t connect well.
Real-world examples
- Lisbon → Milan: A route where flying can make sense because the overland alternatives can be very time-consuming.
- Dublin → Amsterdam: Flying is usually the most straightforward option; just budget extra time for airport transfers.
Actionable tips for making budget flights actually budget
- Measure your bag before you leave. Not “it looks small enough”—actually measure. The gate fee is where budgets go to die.
- Price the whole trip: fare + bag + seat + transfers. Compare that number to a night train couchette or sleeper bus.
- Choose airports intentionally: a slightly pricier flight to a closer airport can be cheaper overall (and less miserable).
- Protect the next day: if you’re arriving very early, plan a café breakfast and a flexible morning activity rather than a timed museum slot.
Option 3: Sleeper buses (the “network everywhere” wildcard)
What you’re really paying for
Sleeper buses are often the lowest upfront cost—and they cover routes that trains don’t. They’re especially useful when you’re hopping between smaller cities or crossing borders where rail connections are slow or awkward.
Comfort & sleep quality
- Best for: budget travelers, people who can sleep sitting up, anyone traveling with a tight itinerary and flexible expectations.
- Seat quality varies wildly: some routes have roomy, reclining seats; others feel like you’re spending the night in a politely upholstered kitchen chair.
- Stops are the sleep killer: border checks or multiple pick-ups can break your rest into tiny fragments.
Speed & logistics
Door-to-door, buses can be efficient because they often depart from central stations. But traffic, delays, and route length can be unpredictable. The upside is you usually don’t need to arrive as early as you would for a flight.
Real-world examples
- Prague → Kraków: A common overnight-ish hop where bus schedules can be very convenient.
- Split → Zagreb (season-dependent): Sometimes easier by bus depending on rail options and timing.
Actionable tips to survive (and maybe even enjoy) a sleeper bus
- Pick your seat like a pro: aim mid-bus for less sway; avoid the very back if you’re sensitive to motion.
- Bring layers: buses can swing from sauna to fridge. A light hoodie and socks can save your night.
- Pack a “bus kit”: earplugs, eye mask, water, small snack, and a phone charger (not all outlets work).
- Plan for a groggy arrival: book accommodation with luggage storage or a 24-hour desk if you’ll arrive very early.
The comparison that actually matters: pick based on your travel personality
1) If you’re chasing maximum sightseeing time
Best bet: Night trains (when routes exist). You land in the city center and can start the day without an airport transfer. Sleeper buses can also work if the arrival station is central and the route isn’t too stop-heavy.
2) If you’re on a strict budget
Best bet: Sleeper buses for many corridors, budget flights when you can travel with a personal item only. Night trains can still be competitive if you’re replacing a hotel night—do the math, not the vibes.
3) If you’re a comfort-first traveler
Best bet: Night trains with a couchette or sleeper. Flying at odd hours and sleeper buses are usually rougher on your body (and mood).
4) If you’re visiting smaller cities or offbeat routes
Best bet: Sleeper buses. They often connect places that rail networks don’t serve well overnight.
Quick “true cost” checklist (use this before you book anything)
- Door-to-door time: include transfers and waiting time, not just the travel time.
- Sleep cost: if you lose a full day to exhaustion, was it really cheaper?
- Accommodation swap: will this replace a hotel night? If yes, subtract what you would have spent.
- Baggage reality: are you traveling light enough for budget flight rules?
- Arrival timing: can you actually check in / store luggage when you arrive?
A note on what’s fueling the night-travel comeback
Part of the renewed interest is practical (saving time and sometimes money), and part of it is cultural: travelers increasingly treat the journey as part of the experience. If you’re curious about how major travel trends evolve—and how people are thinking about transport choices—you can browse broader reporting and travel coverage at The New York Times travel section.
Sample itineraries: choose-your-own overnight strategy
Itinerary A: “Two cities in two days” (minimize wasted hours)
- Day 1: Explore City A all day
- Night: Night train in a couchette
- Day 2: Arrive City B in the morning; start with a breakfast crawl and a walking route
Pro tip: pack tomorrow’s outfit in an easy-to-grab tote so you’re not digging through your bag at 6 a.m. in a narrow compartment.
Itinerary B: “Shoestring hop” (keep costs down)
- Evening: Eat early, buy snacks, board sleeper bus
- Morning: Drop bags at luggage storage; do a park + café morning before accommodation is ready
Pro tip: if you’re prone to stiffness, schedule a bathhouse, spa, or even just a long lunch break the next day.
Itinerary C: “Long jump” (when overland is too slow)
- Late night: Travel to airport via public transport (if available) rather than a taxi
- Early morning: Budget flight with personal item only
- Arrival: head straight to a pre-planned breakfast spot near the center to reset your mood
Pro tip: screenshot boarding passes and key booking details—airport Wi-Fi is not a personality trait you can rely on.
Conclusion: the “best” overnight option is the one that protects your trip
Night trains, budget flights, and sleeper buses can all be the right move—depending on what you value most. If you want the best balance of comfort and city-center convenience, night trains are hard to beat. If you’re doing a long jump or traveling ultralight, budget flights can be efficient. If you’re optimizing for price or reaching smaller destinations, sleeper buses are the flexible MVP.
The main trick is to compare total cost and total energy impact, not just the headline price. Your future self—standing in a beautiful new city with enough sleep to enjoy it—will thank you.

The 12-Week “Micro-Adventure” Roundup: Practical Ideas, Gear, Apps, and Safety Tips for Exploring Your City Like a Tourist
Weekend plans don’t have to be expensive, complicated, or dependent on a flight deal. A growing trend among busy people is the “micro-adventure”: short, local experiences designed to feel novel—often within a 30–90 minute radius of home. The best part is that micro-adventures can be structured like a training plan: small efforts stacked over time create a huge sense of discovery.
This roundup pulls together creative micro-adventure formats, planning tools, low-cost gear ideas, and safety checklists. Use it as a menu: pick one idea per week for 12 weeks, or mix and match whenever your calendar allows.
Why Micro-Adventures Work (and Why They’re Trending)
Micro-adventures solve three common barriers to “doing something fun”: time, money, and decision fatigue. They also capitalize on a psychological quirk—novelty makes time feel fuller. When you add even one new experience a week, you often feel like you’re “getting more out of life” without changing your whole routine.
They can be hyper-local: new neighborhoods, public parks, overlooked museums, riverwalks, staircases, or small-town main streets. In many places, a full day of exploration can be done for less than the cost of dinner out if you bring snacks and use public transport or a bike.
Your 12-Week Micro-Adventure Menu (Pick One Each Week)
1) The Sunrise-to-Coffee Challenge
Choose a viewpoint within 5–10 miles (a hill, bridge, waterfront, tall building with public access). Go at sunrise, then reward yourself with a local coffee shop you’ve never tried.
- Action tip: Use your weather app’s sunrise time and set an alarm for 45–60 minutes earlier than you think you need.
- Real-world example: Many cities have unofficial “sunrise clubs” that meet at the same lookout weekly—search local groups or hashtags.
2) The “Third Place” Sampler
“Third places” are social spaces beyond home and work: libraries, community centers, park pavilions, maker spaces, low-key cafés. Visit three in one day and spend 20 minutes in each.
- Action tip: Ask staff one question at each stop (e.g., “What’s the most underrated event you host?”).
- Value: You’ll quickly learn where local community life actually happens.
3) The Public Transit End-of-the-Line Quest
Ride a bus/train to the last stop on a route you’ve never taken. Walk for 60–90 minutes, then return.
- Action tip: Screenshot your return schedule before you leave—dead zones happen.
- Budget note: This is one of the cheapest ways to “travel” while staying local.
4) The “One Street” Deep Dive
Pick a single street and explore it end-to-end: shops, historical plaques, side alleys, architecture, parks. Document five “tiny stories” (a mural, a small business origin, a unique door, a community noticeboard).
- Action tip: Challenge yourself to buy one small item from an independent business (even a postcard) to anchor the memory.
5) The Night Market or Late-Hours Culture Loop
Look for evening farmers markets, night markets, gallery late nights, or museum after-hours. They’re often less crowded and feel more like an event.
- Action tip: Set a spending cap before you go (e.g., $15) and treat it like a game.
6) The “Stairs, Steps, and Hills” Urban Hike
Many cities hide pedestrian staircases, terraced parks, and steep lanes that give you surprising views.
- Action tip: Search for “public stairs” + your city name or look at the map in terrain mode.
- Fitness data point: A brisk 60–90 minute walk often lands in the 6,000–10,000 step range for many adults, depending on pace and route.
7) The DIY “Taste Trail” Picnic Flight
Turn lunch into a curated tasting without restaurant prices: choose three small items from three different spots (bakery, deli, fruit stand) and assemble them in a park.
- Action tip: Pick one “theme” (local cheeses, spicy snacks, seasonal fruit) to keep it cohesive.
- Real-world example: In many cities, bakeries sell day-old bread at a discount—perfect for picnic boards.
8) The “Micro-Museum” and Hidden Collections Hunt
Seek out lesser-known museums: niche history rooms, university collections, small science centers, transport museums, heritage houses.
- Action tip: Call ahead for opening hours—small venues often have limited schedules.
- Bonus: Many offer discounted or free admission days.
9) The Seasonal Scavenger Walk
Create a list of 12 seasonal sightings (first blossoms, migrating birds, fall colors, holiday lights, farmers market produce). Photograph each over a month.
- Action tip: Keep your list in a notes app and check items off as you go.
10) The “Two Neighborhoods, One Afternoon” Contrast Tour
Pick two neighborhoods with different vibes (historic district + industrial waterfront, upscale retail + student area). Compare architecture, street design, parks, and food options.
- Action tip: Write a quick review afterward: “Best bench,” “Best window display,” “Best cheap bite.”
11) The Rainy-Day Indoor Circuit
Rain doesn’t have to cancel plans. Build a circuit of covered or indoor stops: library + indoor market + arcade + independent bookstore.
- Action tip: Pack a compact umbrella and dry socks—comfort determines whether you’ll enjoy it.
12) The “Volunteer for Two Hours” Adventure
Volunteer shifts can be micro-adventures with a purpose—park cleanups, community gardens, food banks, animal shelters.
- Action tip: Choose a role that puts you somewhere new (a shoreline cleanup, a neighborhood pantry).
- Resource idea: Local councils and community boards often list one-off events.
Planning Tools and Resources (Quick Roundup)
Map and Route Ideas
- Google Maps “Explore” tab: Great for finding clusters of parks, viewpoints, cafés, and “hidden gems.” Save lists like “Picnic Spots” or “Sunrise Views.”
- OpenStreetMap-based apps: Helpful for footpaths and smaller trails that don’t show up clearly elsewhere.
- Local government park sites: Often include PDFs of trails, opening hours, and facilities (toilets, water fountains).
Event and Culture Discovery
- Community calendars: Libraries, universities, and local arts councils frequently host free talks and exhibits.
- Newsletter strategy: Subscribe to just two local newsletters (city events + arts) to avoid info overload.
- News for context: For broader reporting on cultural trends, urban life, and local issues that can inspire what you explore, browsing The Guardian’s coverage of cities and culture can be a useful jumping-off point.
Food Stops Without Overspending
- Set a “one treat” rule: Buy one special item (pastry, local soda, specialty fruit) and keep the rest simple.
- Share portions: Split snacks with a friend so you can sample more places without doubling the bill.
- Go earlier: Bakeries and markets sometimes have end-of-day markdowns, but early visits offer the best selection—choose your priority: variety or savings.
Low-Cost Gear That Makes Micro-Adventures Better
- Small daypack: Comfort matters more than style. A lightweight pack prevents the “I’m carrying too much” regret.
- Refillable water bottle: Dehydration can make even a short walk feel miserable.
- Portable phone charger: Especially if you navigate with maps or take photos.
- Sit pad or compact blanket: Instantly upgrades parks, viewpoints, and picnics.
- Notebook or notes app template: Log what you liked, what you’d repeat, and what you’d skip. This reduces planning time next week.
Micro-Adventure Safety and Courtesy Checklist
- Tell someone your plan: Especially for dawn/dusk walks or unfamiliar areas.
- Check hours and access: Parks, rooftops, and trails may have closing times or seasonal closures.
- Use the “30/30” weather rule: If thunder follows lightning within ~30 seconds, head indoors. Don’t gamble with storms.
- Respect neighborhoods: Keep noise down early/late, follow signage, and avoid photographing people’s homes closely.
- Leave no trace: Pack out trash, even small items like fruit peels and napkins.
How to Turn This Into a 12-Week Challenge (Without Burning Out)
- Alternate “high-energy” and “low-energy” weeks: Pair an urban hike week with an indoor circuit week.
- Use a default schedule: Example: Weeknight = planning (10 minutes). Weekend morning = adventure. Weekend evening = quick reflection.
- Track your “novelty ratio”: Each outing should include at least one new element (new park, new snack, new route). That’s enough to keep it fresh.
- Invite friends occasionally: Social weeks are great, but solo weeks make scheduling easier. A mix helps you stick with it.
Conclusion: Make Local Feel Limitless
Micro-adventures aren’t about doing more—they’re about noticing more. When you use a simple structure (one theme per week), you stop waiting for the “perfect” vacation and start collecting small, memorable moments close to home. Choose one idea from the menu, set a time, and go. By week twelve, you’ll have a personal map of your area—full of views, flavors, routes, and stories you didn’t know were right there.
QR Code Menus vs. Tasting Cards vs. Live Announcers: The Best Way to Guide Guests at Modern Food & Drink Events
Why “guest guidance” is the hidden make-or-break factor at food events
Food and drink events are having a moment: pop-up supper clubs, street-food festivals, brewery tap takeovers, and tasting trails in markets and neighborhoods. Yet the difference between an event guests rave about and one they quietly endure is often not the food itself—it’s how easily people can navigate the experience.
When guests don’t know where to start, what’s included, how to pace themselves, or how to find a dish again, they default to queues, crowd-following, and indecision. That leads to long lines at one booth, empty stalls elsewhere, missed signature items, and poor perceived value—especially when tickets are fixed-price.
This comparison article looks at three increasingly common ways to guide guests through multi-stop events:
- QR code menus and digital maps
- Printed tasting cards and “passport” guides
- Live announcers, hosts, and roaming concierges
You’ll get practical pros/cons, real-world scenarios, and actionable set-up tips that make your next event smoother—whether you’re producing a tasting trail, running a venue collaboration night, or coordinating a community food crawl.
Option 1: QR code menus + digital maps (the “phone-first” approach)
QR codes are now a default tool for events because they’re fast to deploy and easy to update. Typically, each vendor has a QR code that links to their menu, allergens, and portion details. Bigger events add a digital map (Google My Maps, Mapbox embeds, or a simple landing page with stall numbers).
Where QR guidance works best
- Large venues with many stalls where content needs to be searchable and filterable (e.g., “gluten-free,” “spicy,” “under 10 minutes wait”).
- Events that change in real time—items selling out, rotating taps, surprise guest chefs.
- Data-driven organizers who want insight into what people click, when they browse, and which vendors are getting attention.
Pros
- Instant updates: If a vendor sells out of their signature bao at 7:20 pm, you can mark it unavailable at 7:21 pm.
- Accessibility options: Users can zoom text, use screen readers, and translate.
- Built-in analytics: Track scans per location/time to see choke points and under-visited vendors.
- Lower reprint waste: Useful for sustainability goals and last-minute sponsor changes.
Cons
- Connectivity risk: Weak cellular signal or overloaded Wi-Fi can turn guidance into frustration.
- Battery dependence: A dead phone equals a lost guest.
- Decision fatigue: Endless scroll can slow ordering if not designed carefully.
- Inclusion: Some guests avoid scanning for privacy reasons or simply prefer not to use phones while socializing.
Actionable set-up tips (that materially reduce friction)
- Use a “lite” landing page: Avoid heavy PDFs. Aim for fast load times under congested networks.
- Design for a 10-second decision: Put “Top 3 must-try items” above the full menu. Add icons for allergens and heat level.
- Build a queue-balancing feature: Even a simple “If line is long, try stall 12 for a similar dish” can spread demand.
- Print a fallback mini-map: One small printed sign at each entrance with stall numbers prevents total reliance on phones.
- Offer charging points: A few charging lockers or a sponsor-powered “charging bar” can save the experience late in the day.
Option 2: Printed tasting cards + “passport” guides (the tactile, low-tech favorite)
Tasting cards—sometimes called passports—are physical guides guests keep in hand. They often include a map, a checklist of signature items, and tear-off tickets or stamp boxes. This approach is quietly trending again because it makes the event feel like an experience rather than a list of transactions.
Where printed guides shine
- Neighborhood tasting trails where guests wander between venues and want a sense of story and progress.
- Events with a “collect them all” mechanic (stamps, badges, small rewards).
- Brand-forward events where the guide doubles as a keepsake.
Pros
- Immediate clarity: Guests see the whole landscape at once—no scrolling.
- Memorability: A well-designed passport becomes a souvenir and reinforces sponsor value.
- Inclusivity: Works for guests without smartphones or those avoiding QR scanning.
- Better social flow: People stay present and talk more when guidance isn’t screen-based.
Cons
- Not easily updated: If a venue drops out or a dish sells out, the printed info becomes wrong.
- Print costs: High-quality cardstock, fold maps, and stamping stations add up.
- Waste risk: Overprinting means leftovers; underprinting means confusion.
Actionable set-up tips (to keep it modern, not old-fashioned)
- Use “zones” instead of a single route: A, B, C areas reduce congestion and give guests multiple good starting points.
- Limit the passport to curated highlights: The guide should spotlight signature items, not list every SKU. Aim for 8–15 featured stops, even if you have 40 vendors.
- Add a clear pacing plan: Example: “Start with 1 savory, then 1 drink, then 1 sweet” to prevent palate fatigue.
- Include an allergen quick key: A small legend for dairy/nuts/gluten/seafood saves staff time.
- Build a low-cost reward: “Complete 6 stamps and get a bonus bite” spreads traffic and boosts dwell time.
Option 3: Live announcers, hosts, and roaming concierges (the human experience layer)
This approach puts guidance into people rather than paper or screens. Think: a stage MC announcing timed tastings, a host making short “if you like X, try Y” recommendations, or roaming concierges answering questions and diverting crowds.
Where live guidance is unbeatable
- Timed experiences like chef demos, bottle openings, or surprise “drops.”
- Premium ticket tiers (VIP, press, sponsors) where personalized service matters.
- Complex venues with multiple floors, hidden courtyards, or staggered entry lines.
Pros
- Real-time crowd control: Staff can redirect guests away from bottlenecks instantly.
- Higher perceived hospitality: People remember being helped more than they remember a map.
- Upsell potential: Hosts can guide guests to limited items or sponsor activations without feeling like ads.
- Better compliance with safety and etiquette: Humans can reinforce rules politely (glassware zones, entry/exit flow).
Cons
- Labor costs: Training, staffing, and scheduling add budget complexity.
- Message consistency: Different hosts may give different directions unless you brief well.
- Audio challenges: Loud venues can make announcements ineffective without proper sound.
Actionable set-up tips (to make live guidance feel seamless)
- Create a “today’s top 5” script: Keep it tight and repeatable. Rotate every 60–90 minutes.
- Equip roaming staff with micro-maps: Small laminated cards with zones, restrooms, water points, and quiet areas.
- Use timed callouts to manage surges: Announce “short line right now at stall 18” when you see a lull.
- Give concierges one problem to own: Example: one person dedicated to dietary questions, another to accessibility routes.
Comparison: Which guidance system is best for your event?
1) Speed of updates
- Best: QR/digital
- Middle: Live hosts (fast if well-coordinated)
- Least flexible: Printed passports
2) Guest immersion (how “special” the event feels)
- Best: Live hosts + printed passports (tie; one is hospitality, one is keepsake)
- Middle: QR/digital (functional, but can feel transactional)
3) Inclusivity and accessibility
- Best overall: A hybrid (printed + live + optional QR)
- Potential gaps: QR-only events can exclude guests with low battery, low connectivity, or low comfort with scanning
4) Operational control (queues, flow, bottlenecks)
- Best: Live hosts + digital analytics (if you can staff it)
- Good: Digital alone (if you actively manage updates)
- Variable: Printed alone (works if the layout is simple and you control entry pacing)
A practical hybrid model that works in the real world
Many successful events combine all three, but with clear roles:
- Printed “quick start” card at check-in: a simple zone map, restrooms, water points, and 8–10 featured items.
- QR code for deep detail: full menus, allergens, updates, and optional suggested routes by interest (vegetarian route, spice route, dessert route).
- Live micro-guidance: roaming staff and short, scheduled announcements for bottlenecks and special moments.
This hybrid also supports changing guest expectations around sustainability and waste. For a broader perspective on how events and consumers are thinking about environmental impact, you can browse coverage and reporting at The Guardian’s environment section, which regularly discusses waste, packaging, and climate-related shifts affecting public gatherings.
Real-world scenarios: choosing the right approach by event type
Scenario A: A citywide “Taste Trail” with 15 restaurants across 2 miles
- Recommended: Printed passport + QR details
- Why: Guests want a sense of journey and progress; connectivity varies; restaurants may have last-minute changes.
- Tip: Put “closest next stop” suggestions on the printed map to reduce backtracking.
Scenario B: A 60-stall indoor festival in a convention hall
- Recommended: QR/digital map + roaming concierges
- Why: High density means crowd flow is everything; digital lets you push live updates and manage sold-out items.
- Tip: Place at least one large physical map per zone so guests can orient without pulling out phones.
Scenario C: A premium wine-and-small-plates night with timed pours
- Recommended: Live host + small printed tasting card
- Why: Education and pacing are central; people want guidance on pairings and sequence.
- Tip: Keep the card minimal: pour order, pairing notes, and a place to jot “favorites.”
Metrics that prove your guidance system is working
If you want to move beyond vibes, track a few simple indicators:
- Average queue time at top 5 vendors (spot-check every 30 minutes).
- Vendor distribution: are the bottom 25% of stalls still getting steady traffic?
- Redemption rate for tasting tickets or stamp completions (a proxy for how navigable the event felt).
- Repeat scans of QR pages (high repeat can indicate confusion or high interest—pair with a quick on-site survey).
- Guest recall: ask at exit, “Name two dishes you loved.” Better guidance usually increases recall and satisfaction.
Conclusion: the best guidance tool is the one that reduces friction without stealing attention
QR menus, printed tasting passports, and live hosts each solve different problems. Digital tools win on speed and updates. Printed guides win on clarity and emotional stickiness. Live guidance wins on hospitality and crowd control.
For most modern food and drink events, the strongest approach is a hybrid: give guests a quick printed overview, provide QR depth for those who want it, and add a human layer to keep flow smooth and the experience welcoming. When guests spend less time figuring things out, they spend more time tasting, discovering, and talking about your event after the last bite.
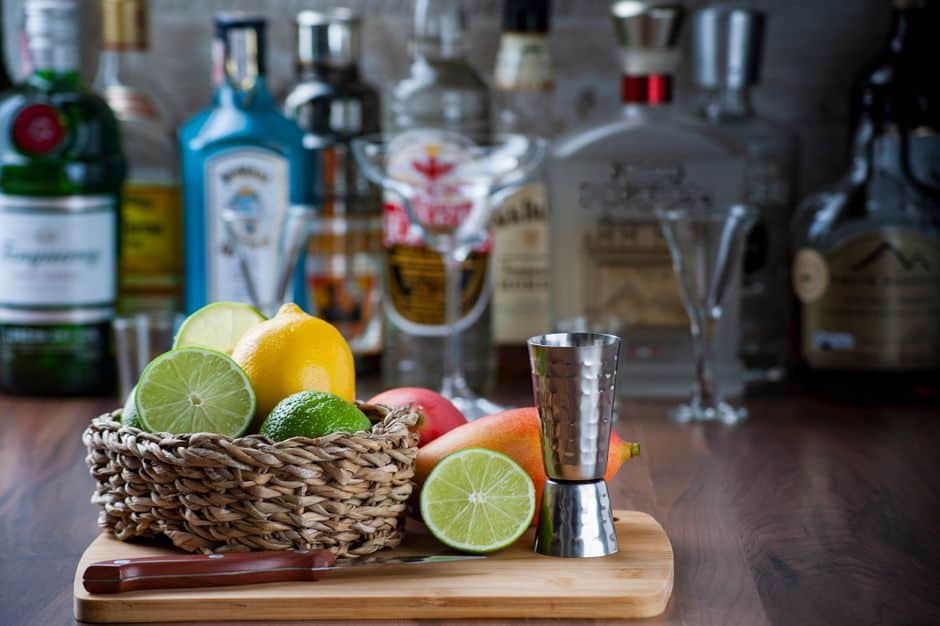
How to Build a Zero-Waste Citrus Bar at Home (Cocktails, Mocktails, and No-Scrap Garnishes)
Why a “Zero-Waste Citrus Bar” Is Trending (and Totally Worth It)
If you’ve ever made margaritas for friends and ended up with a sad pile of lime halves, you already know the problem: citrus is delicious, but it can be weirdly wasteful. A zero-waste citrus bar flips the script. You get better drinks, smarter prep, and a fridge stocked with components that make your week feel fancy—without turning your trash can into a sticky graveyard of rinds.
This guide walks you through building a small at-home citrus station that uses all of the fruit: juice, zest, peels, pith, and even the “spent” shells. You’ll end with ready-to-go syrups, salts, oleo saccharum, and garnishes that make cocktails and mocktails taste like you paid $18 for them.
Bonus: citrus is a huge global crop, and how it’s grown and moved around matters. For a deeper look into food systems and environmental context, resources from National Geographic’s food and sustainability coverage are a great rabbit hole when you’re thinking about ingredients beyond your cutting board.
Step-by-Step: Build Your Zero-Waste Citrus Bar
Step 1) Pick a “citrus mix” with a job (not just random lemons)
Instead of buying a bag of lemons because “recipes,” choose citrus based on what each one does best:
- Limes: sharper acidity; ideal for margaritas, daiquiris, and bright mocktails.
- Lemons: cleaner acidity; great for sours, spritzes, and lemonades.
- Oranges: aroma + sweetness; perfect for old fashioneds, sangria, and shrubs.
- Grapefruit: bitterness + fragrance; excellent for palomas and highballs.
- One wildcard: yuzu (if you can find it), Meyer lemon, or blood orange for seasonal flex.
Actionable tip: A practical starting set for a weekend is 4 limes, 3 lemons, 2 oranges, 1 grapefruit. That’s enough to juice, zest, and garnish without drowning in leftovers.
Step 2) Set up the “citrus workflow” so nothing gets lost
Zero-waste happens when you process citrus in the right order. Here’s the workflow that keeps flavor high and waste low:
- Wash and dry all citrus (yes, even if you’re peeling—wax and grit ruin zest).
- Zest first (before cutting). Use a microplane or peeler for strips.
- Peel/express oils next for garnishes or oleo saccharum.
- Juice after zesting.
- Save shells (spent halves) for quick infusions or cleaning.
Bar setup checklist:
- Microplane or vegetable peeler
- Hand juicer or citrus press
- Fine mesh strainer
- Two small jars (for syrup/sugar projects)
- Sheet pan + parchment (for drying peels)
- Small labeled squeeze bottle for juice (optional but nice)
Step 3) Make “citrus-first” sugar: oleo saccharum in 10 minutes of work
Oleo saccharum sounds like a spell, but it’s basically a bartender trick: sugar pulls fragrant oils out of citrus peels. The result tastes like citrus perfume—in a good way.
What you need: peels from 2–4 citrus + 1/2 cup (100g) sugar.
- Peel citrus in wide strips (avoid too much white pith).
- Toss peels with sugar in a jar, muddle or press gently.
- Let sit 1–4 hours (overnight is great), shaking occasionally.
- Add 1/4 cup hot water, shake, and strain. Store in the fridge 2 weeks.
Real-world use: Swap 1/2 oz of this for simple syrup in an old fashioned or add to sparkling water for a “soda shop” vibe without artificial flavoring.
Step 4) Batch a “citrus base” for mocktails that don’t taste like sad juice
A lot of homemade mocktails fall flat because they’re just juice + bubbles. A base gives structure: acid, aroma, and a little bitterness.
Quick Citrus Base Formula (makes ~2 cups):
- 1 cup mixed citrus juice (try 50% lemon/lime, 50% orange/grapefruit)
- 1/2 cup oleo saccharum (or rich simple syrup)
- 1/2 cup strong brewed tea, cooled (green tea or Earl Grey works)
- Pinch of salt (seriously—makes flavors pop)
- Whisk everything together and chill.
- To serve: pour 2–3 oz over ice, top with sparkling water, garnish.
Data point you can use: A pinch of salt doesn’t just make things “salty”—it reduces perceived bitterness and boosts aroma. If grapefruit drinks taste harsh, salt helps smooth the edges.
Step 5) Turn leftover peels into a next-level garnish stash
This is where your drinks start looking like they came from a serious bar.
Option A: Dehydrated citrus wheels (great for garnish + snacking)
- Slice citrus into thin rounds (1/8 inch is ideal).
- Remove seeds.
- Dry at 200°F (95°C) for 2–3 hours, flipping once.
- Store airtight with a packet of rice (DIY desiccant) to keep crisp.
Option B: Candied peels (the “I can’t believe you made this” move)
- Slice peels into strips. Blanch in boiling water 2 minutes; drain. Repeat once to reduce bitterness.
- Simmer peels in 1:1 sugar-water for 30–45 minutes until translucent.
- Drain, toss in sugar, and dry on a rack.
Actionable tip: Grapefruit peel is more bitter—blanch it an extra time and use thicker syrup (2:1 sugar to water) for a glossy finish.
Step 6) Make citrus salt (your secret weapon for rims and savory snacks)
Citrus salt upgrades everything from micheladas to popcorn. It’s also the easiest way to use zest that might otherwise dry out in your fridge.
Basic Citrus Salt: 2 tablespoons fine sea salt + zest of 1 citrus.
- Rub zest into salt with your fingers until fragrant and slightly damp.
- Spread on a plate and air-dry 1–2 hours (or 10 minutes in a warm oven with the door cracked).
- Jar it and label it (type of citrus + date).
Real-world example: Lime salt + chili powder = instant “street corn” energy. Rim a glass for a spicy mocktail or sprinkle on sliced cucumbers.
Step 7) Use “spent shells” for quick vinegar cleaner or fridge deodorizer
This step isn’t for flavor—it’s for actually finishing the job and keeping your kitchen from smelling like old limes.
- Quick citrus vinegar cleaner: Pack citrus shells in a jar, cover with white vinegar, steep 1–2 weeks. Strain and dilute 1:1 with water for wiping counters.
- Fridge deodorizer: Put dried citrus peels in a small bowl with baking soda.
Tip: If you used citrus for savory cooking (garlic/lemon chicken night), don’t use those shells for cleaning infusions—stick to clean peels only.
Step 8) Build a 3-drink menu so you actually use everything
Here’s a simple plan that prevents “projects” from becoming clutter.
Drink 1: The Weeknight Highball (boozy or not)
- 2 oz spirit (gin/vodka/tequila) or 2–3 oz citrus base
- 1/2 oz oleo saccharum
- Top with sparkling water
- Garnish: dehydrated citrus wheel
Drink 2: The “Better Than Lemonade” Pitcher
- 1 cup mixed citrus juice
- 1/2 cup oleo saccharum
- 4 cups cold water or iced tea
- Pinch of salt
- Optional: add a handful of mint and a few candied peels
Drink 3: The Spicy Rim Mocktail
- Rim glass with citrus salt + chili powder
- 2–3 oz citrus base
- Top with ginger beer or club soda
- Garnish: expressed orange peel (twist over the glass)
Step 9) Storage rules so your citrus bar stays safe (and tasty)
- Fresh juice: best within 24–48 hours (it oxidizes fast). Keep cold, sealed, and label it.
- Oleo saccharum: about 2 weeks refrigerated (longer if very sugary and clean tools were used).
- Dried wheels/peels: 1–2 months airtight, away from humidity.
- Candied peels: 2–3 weeks airtight at room temp, longer refrigerated.
Practical safety tip: If anything develops fuzz, cloudiness with off-smell, or visible fermentation you didn’t plan for—toss it. A zero-waste bar is not a “take chances” bar.
Troubleshooting: Quick Fixes for Common Citrus Bar Problems
- My oleo saccharum isn’t syrupy: You likely didn’t bruise the peels enough. Muddle more, or give it more time.
- My grapefruit garnish tastes super bitter: Avoid pith in peels, blanch before candying, or switch to dehydrated wheels.
- My mocktail tastes flat: Add a pinch of salt and a tiny splash of tea or a bitter component (grapefruit, tonic, or a few drops of non-alcoholic bitters).
- My dried wheels are sticky: Slice thinner and dry longer at lower heat; humidity is the enemy.
Conclusion: Your Fridge Can Be a Tiny Citrus Cocktail Lab
A zero-waste citrus bar isn’t about perfection—it’s about building a simple system where every part of the fruit has a purpose. Zest becomes salt, peels become syrup or candy, juice becomes a base, and even the leftovers can freshen your kitchen. Once you do it once, you’ll start seeing citrus as a set of ingredients, not a single-use garnish.
Try it this weekend with a small citrus mix, make one jar of oleo saccharum, and dry a tray of wheels. By next week, you’ll have a ready-to-go drink upgrade kit that’s cheaper than going out—and way more satisfying than throwing away a mountain of rinds.
9 High-ROI “Micro-Hospitality” Upgrades That Make Guests Feel Instantly Cared For (Without a Full Renovation)
Micro-hospitality: the small, strategic touches that guests remember
In a crowded hospitality market, competing solely on room size or amenities can become an expensive arms race. A more creative (and often higher-ROI) approach is micro-hospitality: small, intentional upgrades to the guest experience that reduce friction, signal care, and create repeatable “wow” moments—without a full property overhaul.
Below are nine micro-hospitality upgrades hotels, B&Bs, serviced apartments, hostels, and even restaurants with rooms can implement quickly. Each item includes practical steps, realistic examples, and measurable ways to track impact.
1) Create a “24-Hour Arrival” flow (because guests don’t arrive on your schedule)
Why it’s trending: Late flights, remote work, and flexible travel mean arrivals are less predictable. A seamless after-hours experience reduces stress and negative reviews.
Actionable upgrade:
- Offer at least one self-serve check-in option (digital key, lockbox, or keypad) for late arrivals.
- Send a single message that covers: door access, Wi-Fi, breakfast hours, parking, and who to contact—written for someone tired and jet-lagged.
- Provide a “late landing kit” at reception or in-room: water, a small snack, and clear instructions for nearby late-night food.
Real-world example: Many city properties now include “arrival playlists” in pre-arrival emails (a short list of open eateries + estimated walk time). It’s cheap to create and dramatically lowers “Where can I eat right now?” calls.
How to measure: Track after-hours call volume and the number of check-in related complaints in reviews before/after implementation.
2) Install a “comfort bar” instead of guessing what guests forgot
Why it works: Guests don’t mind paying a little for convenience; they resent feeling unprepared. A comfort bar turns small emergencies into relief.
Actionable upgrade:
- Curate a small in-room or lobby “comfort bar”: stain remover wipes, blister plasters, sewing kit, earplugs, phone chargers, hair ties, travel-size deodorant.
- Keep pricing fair and transparent; the goal is trust, not margin.
- Include a free option (e.g., earplugs or a basic toothbrush) to build goodwill.
Operational tip: Put high-demand items (chargers, blister plasters) in a clearly labeled container so staff can restock in under 60 seconds during room turns.
How to measure: Monitor front desk “forgotten item” requests and note reductions. In many properties, these requests spike on weekends and event dates—prime opportunities for impact.
3) Design a “silent room” protocol for light sleepers
Why it’s specific and valuable: Noise complaints are among the most common review triggers. Not every property can renovate for soundproofing, but you can offer a credible alternative.
Actionable upgrade:
- Tag certain rooms as “silent preference” in your PMS: away from lifts/ice machines, top floors where possible, courtyard-facing, etc.
- Stock those rooms with: high-quality earplugs, a white-noise option (device or QR to a curated playlist), and door draft stoppers where appropriate.
- Add a pre-arrival question: “Do you prefer quiet, view, or proximity to facilities?” Then honor it when you can.
Example script for confirmation email: “If sleep is a priority, reply with ‘quiet’ and we’ll assign our calmest available room.”
How to measure: Track noise-related reviews and compensation incidents. Even a small reduction improves profitability and staff stress.
4) Offer “hyperlocal hydration” (it’s not about water, it’s about belonging)
Why it’s creative: Guests increasingly want experiences that feel rooted in place. A generic welcome bottle is forgettable; a locally tied hydration ritual is share-worthy.
Actionable upgrade:
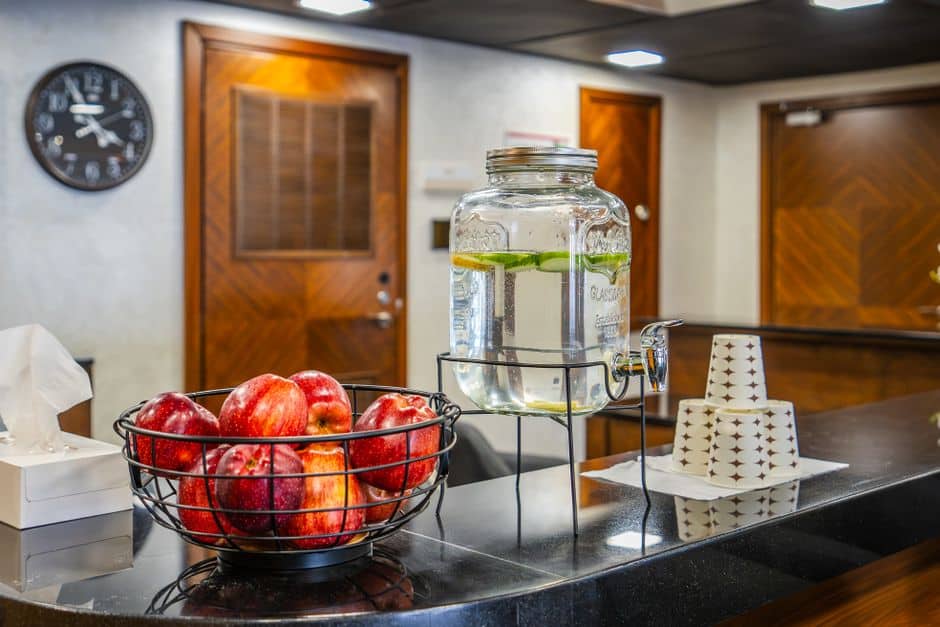
- Replace standard bottled water with a refillable carafe and a clearly signposted water station (filtered, chilled, sparkling if possible).
- Add a rotating local element: regional herbal tea sachets, a small card explaining the local water source, or a seasonal infused-water option in the lobby.
- Communicate the sustainability angle honestly—no guilt, just clarity.
Data point angle: Properties that shift from single-use bottles to refill stations often reduce waste and recurring supply costs. If you want broader context on the scale of plastics and waste issues that influence traveler expectations, reporting from The Guardian can be a useful resource to share internally when aligning teams on sustainability decisions.
How to measure: Count bottles avoided (or refills logged), track guest mentions of “eco” or “sustainable” in reviews, and monitor minibar/water supply spending month-over-month.
5) Make “work-from-anywhere” actually work: micro-office readiness in every room
Why it’s evergreen now: Business travel is evolving; leisure guests also bring laptops. A room that supports work reduces complaints and increases midweek occupancy appeal.
Actionable upgrade:
- Add two things to every room: a proper task light and at least one easy-reach power outlet (or a high-quality extension with USB-C).
- Provide a “Wi-Fi in one line” card: network name, password, and a QR code for quick connection.
- Offer a loanable kit: laptop stand, external keyboard, and HDMI cable (kept at reception).
Real-world example: Some boutique hotels position a small “desk caddy” with a notepad, pen, and cable tie—tiny cost, big perceived readiness.
How to measure: Track Wi-Fi related tickets, “desk/chair” complaints, and midweek booking conversions after updating your room description to highlight work-friendly features.
6) Build a “two-minute fix” housekeeping checklist to prevent the most common review killers
Why it’s high ROI: Many negative reviews come from small maintenance issues: wobbly handles, low water pressure, stained grout lines, flickering bulbs. A micro-checklist catches issues before guests do.
Actionable upgrade:
- Create a housekeeping add-on checklist that takes two minutes: test TV remote, check shower temperature, check drain speed, confirm bedside lights, confirm curtains close fully.
- Give staff permission to log a fix instantly via a QR code form (date, room, issue).
- Hold a 10-minute weekly “top 5 issues” huddle: what’s recurring and why?
Operational tip: The goal isn’t perfection; it’s consistency. Two minutes per room is scalable and protects your review score.
How to measure: Track maintenance tickets by category and compare review mentions before/after (especially “clean,” “broken,” “old,” “smell”).
7) Replace generic recommendations with a “choose-your-mood” local guide
Why it stands out: Guests can find “top restaurants” anywhere. They value curation that feels like a friend’s advice—especially when it’s tailored to a mood.
Actionable upgrade:
- Create a one-page guide divided into moods: “Cozy & Quiet,” “Quick & Delicious,” “Celebration,” “Rainy Day,” “Solo Dining,” “Kid-friendly,” “Late-night.”
- Add 1–2 lines for each recommendation: what to order, best time to go, and if booking is needed.
- Include accessibility notes: steps/no steps, noise level, and distance.
Real-world example: A small coastal inn might recommend: “Windy evening: fish chowder + window seat at X, arrive before 6 pm to avoid a queue.” That specificity feels human—and gets shared.
How to measure: Add a tiny prompt: “Did you try one of our picks?” via QR survey; measure engagement and track guest mentions in reviews.
8) Add a “micro-celebration” option at booking (and systemize delivery)
Why it’s specific: Birthdays, anniversaries, proposals, and reunions drive travel. Guests often want a small moment, not a luxury package.
Actionable upgrade:
- Add low-friction add-ons: a handwritten card, a small dessert, a mini bouquet, or a locally made treat.
- Use a simple rule: all micro-celebrations are delivered by a set time (e.g., 5 pm) so housekeeping and front desk can plan.
- Offer one budget-friendly option and one premium option—clear inclusions, no surprises.
Operational tip: Create a “celebration kit” in storage: blank cards, envelopes, ribbon, and a list of local suppliers with lead times.
How to measure: Track attach rate (percentage of bookings with add-ons) and whether celebratory stays have higher review scores or return rates.
9) Train one “recovery move” per department for service slips (so problems don’t become reviews)
Why it’s essential: Mistakes happen. What guests remember is speed, clarity, and fairness. A simple recovery playbook empowers staff and protects ratings.
Actionable upgrade:
- Front desk: one-step resolution for common issues (room change options, late check-out guidelines, transport help).
- Housekeeping: a “reset priority” pathway—when a guest reports a cleanliness issue, the fix is immediate, not queued.
- F&B: a fast “make it right” approach for delayed orders (clear time estimate + small peace offering).
Practical script: “Thank you for telling us. Here’s what I can do in the next 10 minutes, and here’s what I’ll do after that. Does that work for you?”
How to measure: Track time-to-resolution and the percentage of issues solved without compensation. Often, clear communication reduces the need for discounts.
Conclusion: micro-hospitality is a compounding advantage
The most memorable hospitality experiences aren’t always the most expensive—they’re the most considerate. Micro-hospitality upgrades work because they focus on how guests actually move through a stay: arriving tired, needing clarity, wanting comfort, seeking local connection, and expecting quick recovery when something goes wrong.
Choose two or three upgrades to start, attach a simple metric to each (calls avoided, complaints reduced, add-on attach rate, review mentions), and refine monthly. Over time, these small improvements compound into a brand reputation that feels personal, modern, and genuinely welcoming—no renovation required.

Coolcation Planning Guide: FAQs for Beating the Heat With High-Altitude, Lakeside & Night-Shift Travel
Heatwaves and record-breaking summer temperatures are changing how people plan holidays. One of the most interesting (and practical) shifts is the rise of the “coolcation”: trips designed around cooler climates, higher elevations, lakes, forests, and even nighttime sightseeing. Instead of chasing peak-season sunshine, travelers are optimizing for comfort, safety, and better sleep—without sacrificing culture, food, or adventure.
This FAQ-style guide helps you plan a coolcation with specific strategies, real-world examples, and on-the-ground tips for choosing destinations, building an itinerary, packing, and managing transport and budgets.
What exactly is a “coolcation,” and why is it trending now?
A coolcation is a holiday planned to avoid extreme heat—typically by choosing higher latitudes (further north/south), higher altitudes, coastal microclimates, forested areas, or lake regions that stay noticeably cooler than major inland cities in summer.
It’s trending because heat affects:
- Comfort: walking tours, museums without AC, long transit days.
- Safety: heat exhaustion and dehydration risks rise during outdoor activities.
- Sleep: hot nights can ruin recovery and enjoyment.
- Itinerary reliability: wildfires, heat advisories, and transport disruptions can force last-minute changes.
Major newsrooms have tracked the trend and its link to hotter summers; for broader context and reporting on shifting travel patterns, see coverage from The Guardian’s climate and travel reporting.
How do I choose a coolcation destination that’s genuinely cooler (not just “marketed” as cool)?
Use a three-layer check before booking:
- Layer 1: Average highs and nighttime lows. A place with 24°C days but 18–19°C nights often feels far better than 30°C days and 25°C nights.
- Layer 2: Microclimates. Coastal winds, lake effects, and shade from forests can create a “feels-like” difference of several degrees.
- Layer 3: Built environment. Dense urban areas trap heat (urban heat island effect). Smaller towns, parks, and waterfront districts cool faster after sunset.
Actionable tip: When comparing places, check the “hourly” forecast for a typical week in your travel month (not just monthly averages). This reveals whether evenings cool down enough for comfortable dining and sleep.
What are the best types of coolcation destinations (with examples) beyond the obvious?
Instead of defaulting to “go north,” consider these creative destination categories:
1) High-altitude food regions (cooler air + iconic local cuisine)
Why it works: Temperatures drop with elevation. Many mountain towns also have strong culinary identities (cheeses, cured meats, berry desserts, alpine herbs).
- Example: The Dolomites (Italy) for hut-to-hut hikes with hearty Tyrolean meals.
- Example: Slovenia’s Julian Alps for lake swims near Bled and cooler evening promenades.
2) Lake-and-sauna circuits (active days, restorative evenings)
Why it works: Lakes moderate temperature swings and enable midday cooling breaks. Sauna culture makes chilly evenings a feature, not a bug.
- Example: Finland’s Lakeland: morning paddling, afternoon forest walks, evening sauna + lake dip.
- Example: Austria’s Salzkammergut: lakeside villages with mountain viewpoints and pastry cafés.
3) “Night-shift” cities (places that come alive after sunset)
Why it works: You can explore in cooler hours: late museum nights, dusk markets, evening river walks, and early-morning bakery runs.
- Example: Reykjavík (Iceland) in summer: long daylight lets you shift activities later without losing visibility.
- Example: Edinburgh (Scotland): cooler summer evenings suited to walking routes and festivals.
How can I build a “cool-first” itinerary that still feels full and exciting?
Design your days around the temperature curve:
- Early morning (coolest): viewpoint hikes, cycling, long walks, outdoor markets.
- Midday (warmest): shaded parks, galleries, long lunches, boat rides with breeze, naps, or spa/sauna (if the region supports it).
- Late afternoon/evening: waterfront promenades, food tours, outdoor concerts, sunset photography.
Real-world example schedule: In a lakeside region, plan a 7–10 km forest trail before breakfast, spend midday at a lakeside café and swim, then do a short boat cruise at 6–8 pm when the breeze returns.
Which months are best for coolcations, and how do I avoid crowds?
For many “cool” regions, the sweet spot is late spring (May–June) or early autumn (September), when:
- Daytime temps are comfortable for walking and hiking.
- Accommodation availability improves (often better value than peak summer).
- Attractions are less crowded, but services are still operating.
Actionable tip: If you must travel in July/August, consider smaller base towns near popular hotspots. Example: stay in a quieter lakeside village and day-trip to the headline destination early morning.
What should I pack for a coolcation where weather can change quickly?
Coolcations often involve variable conditions (wind, rain, cooler nights). A smart pack list reduces bulk while keeping you comfortable:
- Layering system: base layer + mid layer (fleece/light sweater) + windproof/waterproof shell.
- Footwear: one pair of comfortable walking shoes with grip; optional sandals for lake/sauna.
- Accessories: thin beanie or buff, lightweight gloves for high elevations, sunglasses (yes—UV can be intense at altitude).
- Reusable water bottle: dehydration still happens in cool climates, especially while hiking.
Practical tip: If your destination has frequent showers, pack quick-drying fabrics and a compact umbrella—wind can make umbrellas less useful in coastal areas, where a hooded shell is better.
How do I plan transport for a coolcation without spending a fortune?
Cool destinations can be pricier in peak periods, but you can control costs with planning:
- Book rail early where possible—many European routes have cheaper advance fares.
- Use one “anchor” base for 4–7 nights to reduce transit costs and time.
- Choose regions with strong local transit (buses to trailheads, ferries across lakes, integrated ticketing).
- Mix premium and budget days: one paid guided hike + several self-guided days using marked trails.
Actionable tip: If a destination requires a rental car, compare against a rail-and-bus itinerary. In lake regions, boats can replace taxis for scenic transfers.
Are coolcations always “greener,” and how can I make mine more responsible?
Not automatically. A coolcation can still be high-impact if it involves long-haul flights for a short stay. Make it more responsible by:
- Staying longer (e.g., 7–10 nights instead of 3–4) to reduce emissions per day.
- Choosing lower-carbon transport where feasible (rail instead of short flights).
- Traveling in shoulder seasons to reduce pressure on local services and ecosystems.
- Respecting wildfire and trail guidance: follow local restrictions, avoid off-trail shortcuts that erode landscapes.
Practical tip: In fragile alpine or coastal areas, prioritize established paths and local operators who limit group sizes and follow “leave no trace” practices.
How do I stay safe and comfortable if the “cool” destination has an unexpected hot spell?
Even cool regions can spike in temperature. Build flexibility into your plan:
- Keep a “heat plan” list: shaded botanical gardens, indoor cultural sites, boat rides, higher-elevation excursions.
- Choose accommodation with ventilation: fans, cross-breeze windows, or at least blackout blinds to reduce daytime heat gain.
- Shift your day: early hikes, midday rest, late dinners.
- Hydrate and add salts if you’re active—especially after saunas or long walks.
Data-backed reality check: When humidity rises, the “feels-like” temperature can be significantly higher than the actual air temperature. Plan activities based on the feels-like metric, not just the number on the thermometer.
What are a few ready-to-copy coolcation itinerary ideas?
Itinerary A: “Lakes + Local Food” (5 days)
- Day 1: Arrival, waterfront walk, early dinner.
- Day 2: Morning hike, midday swim + café, evening boat ride.
- Day 3: Local food trail (cheese/fish/berries), museum in warmest hours.
- Day 4: Bike loop around the lake; sunset viewpoint.
- Day 5: Market breakfast, depart.
Itinerary B: “Altitude + Culture” (7 days)
- Days 1–2: Base in a valley town; gentle acclimatization walks.
- Days 3–4: High-elevation day hikes; pack layers and start early.
- Day 5: Rest day with cable car views + long lunch.
- Days 6–7: Scenic train/bus day trip to a cooler neighboring town; depart.
Conclusion: Is a coolcation worth it?
If you’ve ever cut a sightseeing day short because it was too hot to walk, a coolcation is worth trying. The best coolcations aren’t about “hiding” from summer—they’re about designing travel around comfort so you can be outside more, sleep better, and enjoy food and culture without heat dictating every decision.
Start with one change: pick a destination with cooler nights, build an itinerary that uses mornings and evenings well, and pack layers. You’ll likely discover a more relaxed, active style of travel that still feels rich—just less sweaty.

Digital Declutter Face-Off: Minimalist Phone, Dumbphone, or “Second Brain” System—Which Actually Sticks?
Why this comparison matters (and why it’s not just “use your phone less”)
Digital clutter is no longer just an aesthetic problem—it’s a friction problem. Too many apps, unread notifications, messy files, and unstructured notes create micro-delays that compound into lost focus and decision fatigue. The challenge is that most advice stops at generic tips like “turn off notifications” or “do a detox.” Those can help, but they often fail because they don’t match how you actually work, socialize, and manage obligations.
This guide compares three specific, increasingly popular approaches that people are using right now:
- The Minimalist Smartphone (keep your smartphone, but redesign it to reduce temptation)
- The Dumbphone (or “lite phone”) Switch (remove the ecosystem by changing the device)
- The “Second Brain” System (keep the digital firehose, but build an external system to capture and organize)
Each option can work. The best choice depends on your job, your social reality, and your tolerance for friction.
Approach #1: The Minimalist Smartphone (same device, radically different setup)
Who it’s for
This is for people who rely on modern smartphone functions—maps, camera, banking, ride-hailing, two-factor authentication—but want fewer “attention leaks.” It’s also the easiest approach to test in a single afternoon.
How it works
- Remove attention traps: social apps, short-form video, news alerts, shopping push notifications.
- Change default surfaces: make the home screen boring and functional (calendar, notes, weather, maps).
- Batch access: keep tempting apps in a folder on the last screen, or require an extra step to open them.
Practical setup (30–45 minutes)
- Home screen rule: one screen only—no extra pages. Everything else goes into the app library or a single folder called “Tools.”
- Notification rule: only allow notifications from people or time-sensitive systems (calls, texts, calendar reminders, banking fraud alerts). Everything else is pull, not push.
- Color rule: switch to grayscale during work hours or evenings to reduce dopamine “pop.”
- Default rule: set your browser to open a blank page, not a news feed.
Real-world example
A project manager who needs Slack and email on the go can still keep them—while banning all non-essential notifications. The result is fewer context switches. One practical tweak: allow VIP notifications only from your team lead and spouse/partner; everything else is checked on a schedule (e.g., 10:30 a.m., 2:30 p.m., 5:30 p.m.).
Pros
- Lowest cost and easiest to test
- Keeps modern conveniences (navigation, camera, transit passes)
- Highly customizable for different lifestyles
Cons
- Relies on self-control (you can always re-install or undo restrictions)
- Social platforms can creep back in during stressful periods
- Requires periodic “maintenance” when apps update or settings reset
Approach #2: The Dumbphone (change the environment, not your willpower)
Who it’s for
This approach is for people who repeatedly relapse into compulsive scrolling, late-night screen habits, or constant checking—even after trying app limits. It’s also increasingly popular among creatives and students who want long, uninterrupted stretches of attention.
How it works
The dumbphone strategy uses a device with limited functionality (calls, texts, maybe maps/music) so you cannot easily access the infinite scroll. It’s environmental design: if the trigger is gone, the habit is harder to enact.
Two ways to do it
- Full switch: move your SIM to a dumbphone for 30 days.
- Split device: keep a smartphone at home (Wi‑Fi only) for specific tasks—banking, travel booking, photos—while your daily carry is a dumbphone.
Actionable tips before you switch
- Audit your “smartphone dependencies”: two-factor authentication, transit tickets, banking, rideshare, group chats, work apps.
- Create substitutes: a small camera, paper notebook, dedicated alarm clock, physical map for routine commutes.
- Tell your key people: set expectations (you’ll respond to messages 2–3 times/day, not instantly).
Real-world example
A freelancer who loses billable hours to social media may move to a dumbphone during weekdays, while keeping a smartphone in a drawer for administrative blocks (e.g., 4:30–5:30 p.m. for invoicing, uploads, banking). This can protect the core working hours without cutting off digital life entirely.
Pros
- Biggest reduction in mindless screen time for many people
- Less temptation; fewer “just checking” loops
- Can improve sleep by removing late-night browsing triggers
Cons
- Higher friction: navigation, two-factor logins, tickets, and photos can get complicated
- May be incompatible with certain jobs or family logistics
- Social coordination can suffer if your community lives in app-based group chats
Approach #3: The “Second Brain” System (make digital information usable)
Who it’s for
This is for people drowning in notes, screenshots, links, half-finished drafts, and scattered files—especially knowledge workers, students, creators, and managers. If your problem is not just distraction but information overload, a second brain can transform chaos into an advantage.
How it works
A second brain is an externalized, searchable system for capturing, organizing, and retrieving information—so your head is not the storage unit. You’re not necessarily reducing screen time; you’re reducing mental friction by building a trusted structure.
A practical, lightweight framework (that won’t collapse in a week)
- Capture: one default inbox (notes app, task manager, or email-to-self). No “multiple inboxes.”
- Clarify: process the inbox once daily for 10 minutes—turn items into tasks, reference notes, or delete.
- Organize by outcomes: use categories like Projects, Areas (ongoing responsibilities), Resources (reference), Archive.
- Retrieve: a weekly review to keep the system trustworthy.
Tools: keep it simple
You don’t need an elaborate stack. Choose one primary notes app and one task manager. Many people succeed with a default notes app plus a calendar. The winning tool is the one you will open daily.
Real-world example
A parent juggling school emails, medical appointments, and home repairs can use a second brain to stop “open loops.” A simple setup:
- Projects: “Find pediatric dentist,” “Plan summer camp,” “Replace dishwasher”
- Areas: “Family health,” “Home maintenance,” “Finances”
- Resources: warranty PDFs, contractor numbers, school calendar links
This reduces the frantic searching that leads people back into their phone’s attention traps.
Pros
- Turns digital life into a system you can trust
- Reduces stress caused by forgetfulness and scattered info
- Scales well for complex lives and long-term goals
Cons
- Does not automatically reduce social media temptation
- Requires a weekly review habit to stay effective
- Easy to overbuild (too many tags, notebooks, folders)
Comparison: Which approach wins on what?
1) Fastest results
- Winner: Dumbphone for immediate reduction in compulsive use.
- Runner-up: Minimalist smartphone if you’re disciplined and willing to prune aggressively.
2) Best for busy professionals
- Winner: Minimalist smartphone + Second brain as a combined strategy: keep essential apps, but route information into a structured system.
3) Best for students and deep work
- Winner: Dumbphone (during study blocks) or split-device setup.
- Runner-up: Minimalist smartphone with strict downtime schedules.
4) Best for families and coordination
- Winner: Minimalist smartphone (because modern coordination often depends on apps).
- Runner-up: Second brain to manage schedules, documents, and recurring tasks.
5) Best for long-term sustainability
- Winner: Second brain if your core problem is complexity, not temptation.
- Winner (alternate): Minimalist smartphone if you want a realistic lifestyle change without abandoning convenience.
Use data wisely: measure what changes (not what you “feel”)
Whichever approach you choose, track two or three metrics for 14 days:
- Total daily screen time (device report)
- Pickups/unlocks per day
- Time-to-start: how long it takes you to begin a meaningful task after picking up your phone
Even a modest reduction in pickups can be meaningful. The goal is fewer fragmented moments, not perfection.
Hybrid strategies that often outperform “pure” approaches
Hybrid #1: Minimalist smartphone + “hard boundaries” apps
Instead of relying on willpower, set time windows for distraction apps (e.g., 20 minutes at 7 p.m.). Keep them off your home screen. Put friction in the way.
Hybrid #2: Dumbphone on weekdays, smartphone on weekends
Many people find weekday structure easier than constant moderation. If weekends involve travel, photos, or social plans, a weekend smartphone can be practical—without letting Monday inherit Sunday’s habits.
Hybrid #3: Second brain + notification fasting
Move tasks, links, and reminders into your system, then turn most notifications off. You stop using notifications as your to-do list (which is chaotic) and start using a trusted list (which is calm).
A credible resource if you want deeper reporting
If you want ongoing, research-informed reporting on attention, technology habits, and modern life, a useful starting point is The New York Times technology coverage, which regularly synthesizes expert perspectives and emerging trends around digital well-being.
Conclusion: Choose the approach that matches your failure mode
Most digital declutter attempts fail because they target the wrong problem.
- If your issue is temptation and compulsive checking, the dumbphone (or split-device) approach is the strongest intervention.
- If your issue is constant low-grade distraction while still needing modern tools, the minimalist smartphone is the best balance of convenience and control.
- If your issue is information overload and mental clutter, a second brain system gives you structure, retrieval, and calm—without pretending you can live offline.
Pick one approach, run it for 14 days, and measure the effect. The best digital life isn’t the one with the least technology—it’s the one where technology stops stealing time, attention, and peace.
How to Host a “Citywide Supper Club Crawl” Event (Without Needing a Restaurant or Big Budget)
Pop-up dinners aren’t new—but the way people want to experience them is changing. Instead of booking one pricey table for one night, guests are gravitating toward “multi-stop” food events that feel like a choose-your-own-adventure: a bite here, a story there, a final toast somewhere unexpected. Enter the Citywide Supper Club Crawl: a roaming, reservation-based event that stitches together small plates, micro-venues, and local storytelling into one cohesive night.
For Taste Trail readers, this format is a sweet spot: it’s food-forward, community-driven, and scalable. Best of all, you don’t need to own a restaurant to run one—you need a tight route, dependable partners, and a plan that makes guests feel guided (not herded).
What Is a Citywide Supper Club Crawl?
A Citywide Supper Club Crawl is a ticketed event where guests move through a curated sequence of locations—typically 4–6 stops over 3–4 hours—each offering one signature bite or mini-course, plus a small “moment” (chef chat, ingredient demo, local music, or a story about the neighborhood).
Think of it as a dinner party that’s scattered across a neighborhood and stitched together with a schedule, a theme, and intentional pacing.
Why this format is trending
- People want experiences, not just meals: Guests share multi-stop nights more than single-table dinners because each stop creates a new “scene.”
- Smaller portions, higher variety: A crawl feels indulgent without requiring a heavy three-course commitment at one venue.
- It supports local businesses: Instead of one venue carrying the whole event, multiple partners benefit—bakeries, coffee bars, breweries, bookstores, galleries, and community spaces.
Pick a Specific Theme (The More Specific, the Better)
The biggest mistake with food crawls is being vague. “Tastes of Downtown” is fine, but it’s not memorable. Your theme should act like a filter: it tells you what to include and what to skip.
Creative, specific theme ideas that work
- Midnight Breakfast Crawl: Cereal soft-serve, breakfast tacos, espresso mocktails, and a final stop for pancakes (served as mini stacks).
- Grandma’s Pantry Night: Dishes inspired by nostalgic ingredients—canned peaches, peanut butter, bouillon, cinnamon toast—elevated into small plates.
- The “One Ingredient” Route: Every stop features a different take on the same hero ingredient (tomato, corn, mushrooms, citrus).
- Spice Passport: Each stop highlights a signature spice blend (za’atar, berbere, gochugaru, garam masala) with a 60-second intro card about its origin.
- Books & Bites: Pair a short reading or zine table with a dish inspired by a passage or author theme.
Actionable tip: Put your theme in one sentence that’s easy to sell: “Five stops, five versions of tomato, one neighborhood.” If it doesn’t sound exciting out loud, tighten it.
Build the Route Like a Producer, Not a Foodie
Great events aren’t only about delicious food—they’re about flow. Your goal is to minimize friction: long lines, confusing directions, and overcrowded spaces kill the vibe.
Route planning rules that save your event
- Keep total walking under 1.2 miles: For most mixed-age crowds, this is a comfortable evening distance—especially in warm weather or heels.
- Alternate “fast” and “slow” stops: Example: a quick welcome bite at Stop 1, then a seated 10-minute pairing at Stop 2, then a grab-and-go sweet at Stop 3.
- Schedule micro-windows: Instead of one start time, use waves (e.g., 6:00, 6:20, 6:40). It prevents bottlenecks and makes partners happier.
- Design a strong finale: End with a moment people remember—sparkling toast, dessert flight, live music, or a “secret menu” item only ticket-holders can order.
Real-world example: A “Citrus After Dark” crawl could start at a coffee bar for an orange-cold-brew spritz, move to a taco spot for lime-forward salsa tasting, hit a bakery for grapefruit sable cookies, and end at a rooftop with a yuzu fizz (alcoholic and zero-proof options).
Work With Micro-Venues (Not Just Restaurants)
The most distinctive crawls combine food with unexpected spaces. Micro-venues also tend to be more flexible and eager for creative partnerships.
Venue types that shine in a crawl
- Specialty grocers and spice shops (ingredient tastings, mini demos)
- Flower shops (edible flower garnish station, floral sodas)
- Bookstores (signed recipe cards, author tie-ins)
- Record shops (DJ set + snack pairing)
- Community kitchens (chef pop-up collaborations)
Actionable tip: When pitching partners, lead with what they gain in measurable terms: “You’ll meet 80–120 new customers in two hours, and every guest receives a bounce-back offer that brings them back next week.”
Price It With Margin and Trust (A Simple Template)
Pricing is where many event concepts collapse. Guests will pay for a smooth, guided night—especially when they understand what’s included.
A practical pricing framework
- Base cost per guest: Sum what you pay each stop (often $4–$8 per guest per stop depending on portion and city).
- Operations per guest: Add staffing, wristbands, printing, platform fees, and contingency (commonly $6–$12 per guest total).
- Your margin: Aim for 20–35% gross margin for sustainability.
For example, a 5-stop crawl at $6 per stop is $30 in food. Add $10 in operations and contingency, and you’re at $40 cost. Pricing tickets at $55–$65 gives breathing room for marketing, last-minute adjustments, and your time.
Include clarity: Spell out what’s included (number of tastings, whether drinks are included, dietary options, estimated walking distance). Clear expectations reduce refunds and increase reviews.
Design for Dietary Needs Without Losing the Plot
Food events can feel exclusionary if dietary needs are an afterthought. The fix isn’t “make everything for everyone.” The fix is to design smart options and communicate clearly.
Three approaches that work
- Parallel bites: Each stop offers a standard bite and a pre-planned vegan/gluten-free alternate.
- Choose-your-route: Two mini routes (Route A and Route B) with different venues—guests select at checkout.
- Dietary-friendly theme: Example: “Naturally Gluten-Free Night Market Crawl” featuring rice noodles, arepas, polenta bites, and flourless citrus cake.
Operational tip: Use wristband colors or a simple stamp system (e.g., green stamp = vegan) so staff don’t have to re-ask at every stop.
Make It Feel Guided: Tools That Prevent Confusion
The magic of a crawl is that it feels effortless for guests. That only happens when your back-end planning is detailed.
Guest experience essentials
- A “one-page plan”: Route map, timing windows, what’s included at each stop, and a contact number.
- Check-in that moves: One central check-in point, then staggered waves to distribute crowds.
- A host or roaming concierge: One visible person who can troubleshoot and keep energy up.
- Weather plan: If it’s outdoors-heavy, have a rain alternative (covered patios, indoor corridor, or rescheduling policy).
Data point worth noting: Food costs and operating expenses can fluctuate quickly, which affects ticket pricing and partner agreements. Staying aware of broader pricing trends—like inflation and consumer spending patterns—helps you set realistic budgets. For ongoing reporting and business context, many organizers keep an eye on outlets like Reuters business coverage when planning seasonal event pricing.
Marketing That Doesn’t Feel Like Shouting
Crawls sell best when they feel like a limited, insider invitation. Your job is to make it easy for the right people to imagine themselves there.
High-converting, low-hype tactics
- Release tickets in two drops: Early-bird (limited) + general release. Scarcity encourages action without gimmicks.
- Partner amplification: Give each venue a ready-to-post kit: caption, date, ticket link, and one “behind-the-scenes” detail.
- One signature story per stop: Instead of only posting food photos, share the “why” (family recipe, local farm ingredient, cultural origin).
- Bounce-back offers: Each venue provides a discount valid for 7–14 days after the event—this makes partners eager to promote.
Real-world example: If your theme is “Spice Passport,” make a short reel at each partner featuring the spice blend and one quick sensory descriptor (“smoky,” “lemony,” “warm”). Those micro-stories compound across five stops.
Day-Of Execution: A Simple Run-of-Show
You don’t need a 40-page production binder, but you do need a predictable rhythm.
Sample run-of-show (for a 5-stop crawl)
- T-90 minutes: Text partners the final headcount per wave; confirm any alternates (vegan/GF).
- T-45: Set up check-in; test QR codes; review route signage.
- Start: Welcome, explain timing, remind guests about walking distance and finale location.
- During: Roaming host checks venue pacing every 20 minutes and communicates adjustments.
- Finale: Short toast, thank partners, announce bounce-back offers, invite guests to share feedback via QR.
Pro tip: Build in a 10-minute “float” buffer across the night. If one stop runs late, you can recover without everyone feeling rushed.
Conclusion: Turn One Night Into a Repeatable Series
A Citywide Supper Club Crawl isn’t just a one-off event—it’s a format you can repeat with new themes, new neighborhoods, and seasonal ingredients. When you treat the route like a story, balance variety with pacing, and make the experience feel guided, you create something guests will talk about long after the last bite.
If you’re looking for an events concept that’s creatively flexible, friendly to small businesses, and genuinely fun to produce, the supper club crawl is a standout. Start with one neighborhood, one tight theme, and partners you trust—then let the city become your dining room.
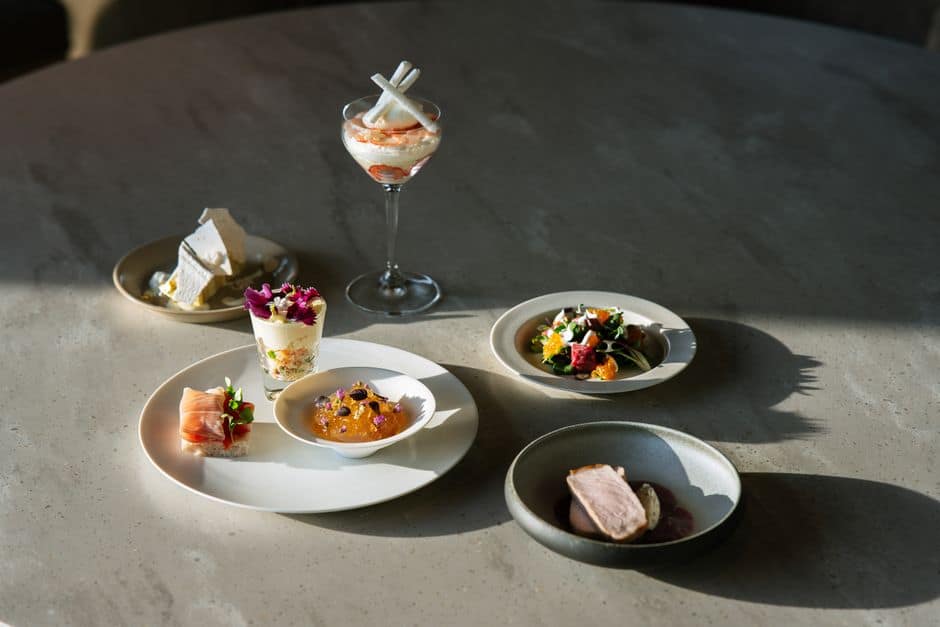
How to Build a “Flavor Flight” Dinner at Home (5 Micro-Dishes, 1 Hour, Zero Boredom)
Why “Flavor Flight” dinners are having a moment
Restaurant tasting menus are fun, but they can be pricey and—let’s be real—hard to pull off on a weeknight. Enter the “Flavor Flight” dinner: a lineup of micro-dishes (think 5–7 small bites) that all riff on one theme. It’s trending because it feels fancy, it’s highly customizable, and it’s a great way to use up odds and ends in your fridge without eating the same leftovers three nights in a row.
This guide shows you how to build a flavor flight that feels intentional (not random snack plate energy), while still being easy enough to do in about an hour. We’ll use a specific, creative theme you can repeat forever: One ingredient, five techniques. Example ingredient: carrots. You’ll serve carrots as pickled, roasted, blended, shaved, and glazed—five different vibes, one cohesive “menu.”
Bonus: technique-based flights are a stealthy way to learn cooking skills fast. A single ingredient means your shopping list stays short, and you can actually taste what each technique does.
Step-by-step: How to host a Flavor Flight dinner
1) Choose a tight theme (and write it down)
A flavor flight works because it has rules. Pick a theme that’s narrow enough to feel curated but flexible enough to be fun. Here are a few non-generic, proven themes:
- One ingredient, five techniques (carrots, mushrooms, apples, chickpeas, tomatoes)
- One sauce, five vehicles (chimichurri on shrimp, potatoes, steak bites, grilled bread, roasted veg)
- A single region, different textures (coastal Mediterranean: briny, citrusy, herby, smoky, creamy)
- The “three acids” flight (vinegar, citrus, fermented acid like kimchi brine) across five bites
- Spice ladder: same base dish, five heat levels (mild to “respectfully intense”)
For this guide, we’ll build the entire plan around: Carrot Flight: 5 micro-dishes, 5 techniques.
2) Set your “flight math”: 5 dishes, 2 bites each, 4 people
Micro-dishes should be small enough to keep curiosity high and commitment low. A practical baseline:
- 5 micro-dishes
- 2 bites per dish (so people can re-taste)
- 4 people
That’s about 40 bites total. In real shopping terms, your main ingredient usually needs to be: 2–3 pounds if it’s a vegetable, or 1.5–2 pounds if it’s a protein (since you’ll vary preparation, not quantity).
This portioning is why flights feel abundant without being heavy. You’re building momentum, not a mountain of food.
3) Pick one “anchor flavor” and repeat it subtly
The secret to making five different dishes feel like one experience: repeat one flavor note across multiple bites. This could be:
- the same herb (dill, cilantro, mint)
- a spice (cumin, smoked paprika, sumac)
- a condiment (tahini, miso, yogurt, chili crisp)
- a crunchy element (toasted sesame, pepitas, fried shallots)
For our carrot flight, the anchor flavor will be toasted cumin + lemon. You’ll use it in 3–4 of the dishes, but lightly, so it reads as “cohesive” instead of “everything tastes the same.”
4) Build the five micro-dishes (carrot example flight)
Here’s a full, real-world flight you can pull off with one cutting board and two burners. Each dish includes a quick method and a plating cue.
Dish A: Quick-pickled carrot ribbons (bright + crunchy)
What you need: 1–2 carrots, vegetable peeler, vinegar, pinch of sugar, salt.
- Peel carrots into long ribbons.
- In a bowl: 1/3 cup vinegar + 1/3 cup warm water + 1 tsp sugar + 1/2 tsp salt. Stir to dissolve.
- Add ribbons, toss, and let sit 15–20 minutes.
- Upgrade: add lemon peel or a pinch of cumin seeds.
Plate it: Twirl ribbons into little nests and top with a few grains of flaky salt.
Dish B: Sheet-pan roasted carrots with cumin-lemon oil (sweet + toasty)
What you need: 4–5 carrots, olive oil, cumin, lemon, salt.
- Heat oven to 425°F (220°C).
- Cut carrots into thick batons (about finger-length). Toss with olive oil, salt, and 1/2 tsp ground cumin.
- Roast 18–25 minutes, flipping once, until browned at edges.
- Finish with lemon juice and a few drops of olive oil.
Plate it: Two batons per person, stacked like a tiny log cabin. Sprinkle with chopped parsley if you have it.
Dish C: Carrot-top pesto crostini (herby + a little wild)
What you need: carrot tops (washed), nuts/seeds, garlic, olive oil, lemon, bread.
- Blend: 1 packed cup carrot tops + 2 tbsp nuts (almonds, pepitas, or walnuts) + 1 small garlic clove + lemon juice + salt + enough olive oil to loosen.
- Toast thin bread slices in a dry pan.
- Spread pesto; add a few pickled carrot ribbons on top.
Why it’s cool: It uses a part of the ingredient most people toss, which is both budget-friendly and more sustainable. If you want a deeper read on how food choices connect to the planet, check out National Geographic’s coverage on food systems and sustainability—it’s a solid way to zoom out from dinner and see the bigger picture.
Plate it: One crostini per person (two bites). Drizzle a tiny bit of olive oil for that restaurant sheen.
Dish D: Silky carrot-ginger “shot” (warm + sippable)
What you need: 3 carrots, ginger, broth/water, blender.
- Slice carrots thin for speed. Simmer in salted water or broth until very soft (10–12 minutes).
- Blend with a coin of ginger, a squeeze of lemon, and a splash of broth until silky.
- Data point you can taste: blended soups feel richer when they’re properly salted—most people under-salt by 20–30%. Add salt in small pinches, tasting each time.
Plate it: Serve in espresso cups or small glasses. Top with a drop of chili oil or yogurt.
Dish E: Sticky soy-honey glazed carrots (savory-sweet finish)
What you need: roasted or steamed carrots, soy sauce, honey (or maple), butter (optional).
- In a pan, add 1 tbsp soy sauce + 1 tbsp honey + 1 tbsp water. Simmer 1 minute.
- Toss in cooked carrot batons and reduce until glossy.
- Pro move: finish with sesame seeds or lime zest.
Plate it: Two glazed pieces per person; add a pinch of toasted sesame for crunch.
5) Create a one-hour timeline (so you’re not cooking all night)
Here’s a realistic schedule for the carrot flight:
- 0:00–0:10 Preheat oven; wash carrots + tops; start pickling ribbons.
- 0:10–0:20 Cut batons; get roasting tray in the oven.
- 0:20–0:35 Simmer carrots for soup; blend; keep warm on low.
- 0:35–0:45 Make carrot-top pesto; toast crostini.
- 0:45–0:55 Glaze carrots in pan; taste and adjust acid/salt.
- 0:55–1:00 Plate in order: pickles → crostini → roasted → soup → glazed.
Actionable tip: Keep a “landing zone” on your counter (one tray or big plate) where finished components go. It prevents the classic flight-dinner problem: losing track of what’s done.
6) Plate like a pro (without buying fancy gear)
Micro-dishes look impressive when they have contrast and negative space. Easy rules:
- Use small plates or bowls (even ramekins). Big dinner plates make micro-dishes look sad.
- Repeat one garnish across the flight (here: lemon zest or toasted cumin).
- Add crunch on purpose: seeds, nuts, croutons, fried onions.
- Wipe edges with a paper towel. It’s a 5-second upgrade.
Real-world hack: if you only have large plates, cluster items in one corner and leave the rest empty. It reads “minimalist,” not “where’s the food?”
7) Pair one drink that evolves with the flight
Instead of pairing each dish (too much work), pick one drink that can handle acid, sweetness, and warmth:
- Alcoholic: dry riesling, sparkling wine, or a light lager.
- Non-alcoholic: sparkling water with lemon + a pinch of salt; or iced green tea.
Practical tip: Put lemon wedges on the table. Guests can tweak their own glass as flavors shift.
8) Keep score (so your next flight is even better)
After dinner, ask two quick questions:
- Which dish was the surprise favorite?
- Where did you want more contrast (more acid, more crunch, more heat)?
Write down one sentence in your phone notes. This is how you build your personal “tasting menu brain” over time.
Conclusion: Your new go-to dinner format
A Flavor Flight dinner is basically the antidote to boring meal ruts: it’s structured, creative, and genuinely doable on a normal night. Start with a simple rule set (one ingredient, five techniques), repeat an anchor flavor, and follow a tight timeline. Once you’ve nailed carrots, you can run the same format with mushrooms, tomatoes, apples, or even canned chickpeas.
If you try this, keep it playful. The goal isn’t perfection—it’s discovering how many different personalities one ingredient can have when you treat it five different ways.
Smart Room Keys Compared: Mobile Key, Wearables, QR Codes, or Classic RFID—What Hotels Should Choose in 2026
Why “room key strategy” has become a guest-experience battleground
Room access used to be a back-of-house detail: print a card, encode it, hand it over. Now it’s a high-stakes moment that influences first impressions, labor costs, security risk, and even review scores. Guests arrive expecting speed, choice, and reliability—yet hotels must balance privacy, fraud prevention, and operational realities like elevator access control and offline functionality.
At the same time, the market is noisy: mobile keys in apps, QR codes via messaging, NFC wearables for resorts, and the tried-and-true RFID card. Each has benefits—and hidden gotchas. This comparison breaks down four key approaches with practical tips and real-world scenarios, so you can choose (or blend) what fits your property.
Option 1: Mobile key in a hotel app (Bluetooth / NFC)
What it is
Guests use the hotel’s app (or a brand app) to open guestroom doors via Bluetooth Low Energy (BLE) or NFC. The digital credential is typically provisioned after identity checks or check-in steps. Doors require compatible locks and software integration with your PMS/CI platform.
Where it shines
- Queue reduction: A well-designed “skip the desk” flow can reduce arrival bottlenecks, especially for business hotels with Monday/Tuesday peaks.
- Lower plastic usage: Some properties report meaningful reductions in card issuance when mobile adoption is high (but keep spare cards for exceptions).
- Upsell moments: App-based access can pair with pre-arrival offers: paid early check-in, room upgrades, late check-out.
Trade-offs to plan for
- Adoption is rarely universal: Not all guests want another app, and some corporate devices restrict Bluetooth/NFC.
- Support burden: “My key won’t open the door” turns into a troubleshooting tree: OS version, permissions, Bluetooth settings, background refresh, battery saver modes.
- Offline edge cases: If the guest has no signal on arrival, your process must still work (pre-provisioning helps; so does a backup RFID card).
Actionable tips
- Make it optional but visible: Present mobile key as a convenience, not a requirement. Include it in pre-arrival emails and SMS, not just at the desk.
- Set a “rescue path” SLA: Train staff to resolve mobile key failures in under 2 minutes—offer a card immediately, then troubleshoot later if the guest wants.
- Audit identity checks: Decide which reservations qualify for remote key issuance (e.g., repeat guests, verified payment, matched ID on file).
Best-fit properties
Business hotels, branded select-service, and urban properties aiming to streamline arrivals—especially where loyalty enrollment is already strong.
Option 2: QR code keys (delivered via web link, email, or messaging)
What it is
Guests receive a QR code that can be scanned at the door reader, turnstiles, elevator controls, or a lobby kiosk. Depending on the system, the QR can be time-limited, tokenized, and refreshed for security.
Where it shines
- No app barrier: Guests can open a link or show a code from their wallet or email—useful for independent hotels and event-heavy properties.
- Fast deployment for some setups: In certain access-control environments (especially where scanning hardware already exists), QR can be easier than full BLE/NFC rollouts.
- Group logistics: Codes can be issued for meeting rooms, spa access, day passes, or contractor entry windows.
Trade-offs to plan for
- Screenshot risk: If your QR code is static, it can be shared. Mitigate with expiring codes, rotating tokens, and device binding when possible.
- Scanner performance: Poor lighting, cracked screens, low brightness, or smudged camera lenses can slow entry and frustrate guests.
- Privacy optics: Guests may worry about links in messages. Clearly brand the communication and explain what data is (and isn’t) collected.
Actionable tips
- Use short validity windows: Issue codes that activate at check-in time and expire at check-out, with rolling refresh for extended stays.
- Offer a “print-on-demand” fallback: A small lobby station (or front desk capability) to print a paper QR for guests without smartphones can prevent accessibility issues.
- Stress-test scanners: Test with low brightness, older phones, and screen protectors. If scanning takes more than 1–2 seconds on average, tune hardware placement and exposure settings.
Best-fit properties
Boutique and independent hotels, mixed-use venues (hotel + coworking + events), and properties that want digital access without requiring app adoption.
Option 3: Wearable keys (NFC wristbands, rings, or smart badges)
What it is
Guests receive an NFC-enabled wristband or wearable device that unlocks the room and can also authorize purchases (cashless resort model), enter pools/gyms, or access kids’ clubs. Wearables can be disposable or reusable with sanitation protocols.
Where it shines
- Resort convenience: No phone, no wallet, no soggy key cards at the pool. This is a genuine “vacation friction remover.”
- Ancillary revenue enablement: When guests can charge with a tap, spend often becomes more impulsive and seamless (especially at bars, cabanas, and activities desks).
- Family-friendly: Parents can keep kids’ access controlled while letting them move around safely with limited privileges.
Trade-offs to plan for
- Inventory and loss: Wearables walk away. You’ll need a loss policy (deposit, charge, or built-in shrinkage budget).
- Sanitation and reuse: Reusables require a cleaning workflow that’s consistent and auditable.
- Brand alignment: A premium resort can make wearables feel like a perk; an upscale city hotel may find them unnecessary or gimmicky.
Actionable tips
- Start with zone access: Begin by using wearables for pools/spa/gym and room entry; add payments later once staff training and guest education are stable.
- Design for comfort: Choose adjustable bands and test for skin sensitivity. Small discomfort becomes a loud complaint.
- Offer opt-outs: Some guests prefer cards or mobile. Choice increases satisfaction more than forcing a single “signature” method.
Best-fit properties
All-inclusive resorts, waterpark hotels, cruise-adjacent lodging, golf and spa destinations, and family-focused properties with extensive on-site activities.
Option 4: Classic RFID key cards (still not obsolete)
What it is
Contactless RFID cards programmed at check-in, widely compatible with hotel lock ecosystems. They can incorporate elevator access control and can be quickly replaced.
Where it shines
- Universality: Works for nearly everyone, regardless of phone model, battery level, or app comfort.
- Speed and familiarity: Staff can issue cards quickly; guests understand them instantly.
- Resilience: Cards can function during network outages depending on your lock configuration.
Trade-offs to plan for
- Replacement churn: Demagnetization is less common with RFID than old magstripe, but lost cards still drive front desk traffic.
- Sustainability pressure: Single-use plastics and repeated re-encoding generate waste and cost; some guests perceive cards as less modern.
- Security hygiene: Poor desk procedures (issuing without ID checks, leaving cards on counters) can undermine the system.
Actionable tips
- Issue fewer by default: Ask “How many keys will you need?” rather than handing out two automatically. It reduces waste and later confusion.
- Switch to recycled or wooden cards where practical: Some suppliers offer more sustainable materials—evaluate durability and reader compatibility before committing.
- Use cards as backup, not as the only plan: Even if you go mobile-first, keep RFID as the fail-safe for accessibility and edge cases.
Best-fit properties
Almost every segment—particularly economy and midscale hotels that need predictable operations and minimal guest tech support.
Comparison snapshot: which approach wins on what?
- Lowest guest friction (for adopters): Mobile app key (when it works smoothly) and wearables (in resorts).
- Lowest adoption barrier: RFID cards and QR codes.
- Best for ancillary spend enablement: Wearables (tap-to-charge) and app keys (pre-arrival offers).
- Best for operational resilience: RFID (plus properly configured offline-capable locks). QR/mobile depend more on systems and devices.
- Best for independents avoiding “another app” problem: QR codes or wallet-based web flows.
Real-world deployment scenarios (and what to copy)
Scenario A: A 120-room downtown hotel with heavy corporate traffic
Recommended blend: Mobile app key + RFID backup. Push mobile adoption via pre-arrival messaging and loyalty perks (like a small F&B credit for using mobile check-in). Keep two desk stations focused on exceptions and group arrivals.
Copy this operational trick: Create a “mobile key rescue kit” at the front desk: a short script, a printed QR help sheet, and a one-tap PMS workflow to issue an RFID without restarting the entire check-in.
Scenario B: A resort with pools, beach access, and multiple outlets
Recommended blend: NFC wearable + optional RFID. Use the wearable for room + towel station + pool gates + charging privileges. Offer RFID to guests who dislike wristbands or have skin sensitivities.
Copy this revenue trick: Tie wearable activation to a brief “how to charge” explanation at check-in, and place subtle reminders at high-margin outlets (“Tap your band to charge to your room”).
Scenario C: A boutique hotel hosting frequent weddings and events
Recommended blend: QR codes for event spaces and short-term access + RFID for guestrooms. QR codes can simplify vendor access windows (florists, AV, photographers) without issuing piles of physical keys.
Copy this security trick: Use time-boxed QR permissions (e.g., 10 a.m.–2 p.m. load-in) and name each credential (“DJ Load-In”) so staff can validate at a glance.
Security and trust: the non-negotiables (no matter what you choose)
Digital convenience is great, but guests care about safety and privacy. Public reporting on cyber risk and business disruption has kept the hospitality sector alert; mainstream coverage of major incidents is a reminder to invest in basics like access management, segmentation, and incident response planning. For ongoing reporting and context on security and business risk across industries, you can consult Reuters coverage as a starting point for staying current.
- Enforce least-privilege access: Staff credentials should only open what they need, for the hours they need it.
- Log everything: Ensure your access system provides usable audit trails for dispute resolution and incident response.
- Plan for outages: Document what happens if internet drops, the lock server fails, or your mobile-key vendor is down. Practice the fallback process.
- Communicate clearly: Guests should know how to get help at 1 a.m. when a phone dies or a wristband breaks.
How to choose: a simple decision framework
Step 1: Map your guest mix
- High loyalty / repeat guests: Mobile app keys gain traction faster.
- International travelers: QR or RFID may be simpler than app downloads (data roaming, app store restrictions).
- Families / resort guests: Wearables often deliver the most delight.
Step 2: Identify your “pain moment”
- Front desk lines: Prioritize mobile or kiosk + mobile.
- Lost keys and re-issues: Mobile can reduce churn; wearables can help in pool-heavy environments.
- Unauthorized access concerns: Focus on expiring credentials, strong ID workflows, and audit logs (applies to all).
Step 3: Run a pilot with measurable goals
- Adoption rate: % of stays using the new method at least once.
- Time-to-room: Average minutes from arrival to successful door open.
- Support tickets: “Key not working” incidents per 100 check-ins.
- Card issuance: Cards per occupied room (a proxy for waste and desk workload).
Conclusion: the best “key” is usually a portfolio, not a single bet
In 2026, the smartest hotels aren’t asking, “Which one replaces key cards forever?” They’re asking, “Which mix reduces friction for our guests while keeping operations resilient?” For most properties, a blended approach wins: RFID as the universal fallback, paired with either mobile keys (for speed and personalization), QR codes (for no-app convenience and event access), or wearables (for resort-style freedom and tap-to-charge simplicity).
If you design the rollout around real guest behaviors—plus clear fallback procedures and staff training—your access strategy becomes more than a door opener. It becomes a quiet, reliable promise that the stay will be easy from the first minute.

Robert B. Anthony